Introduction
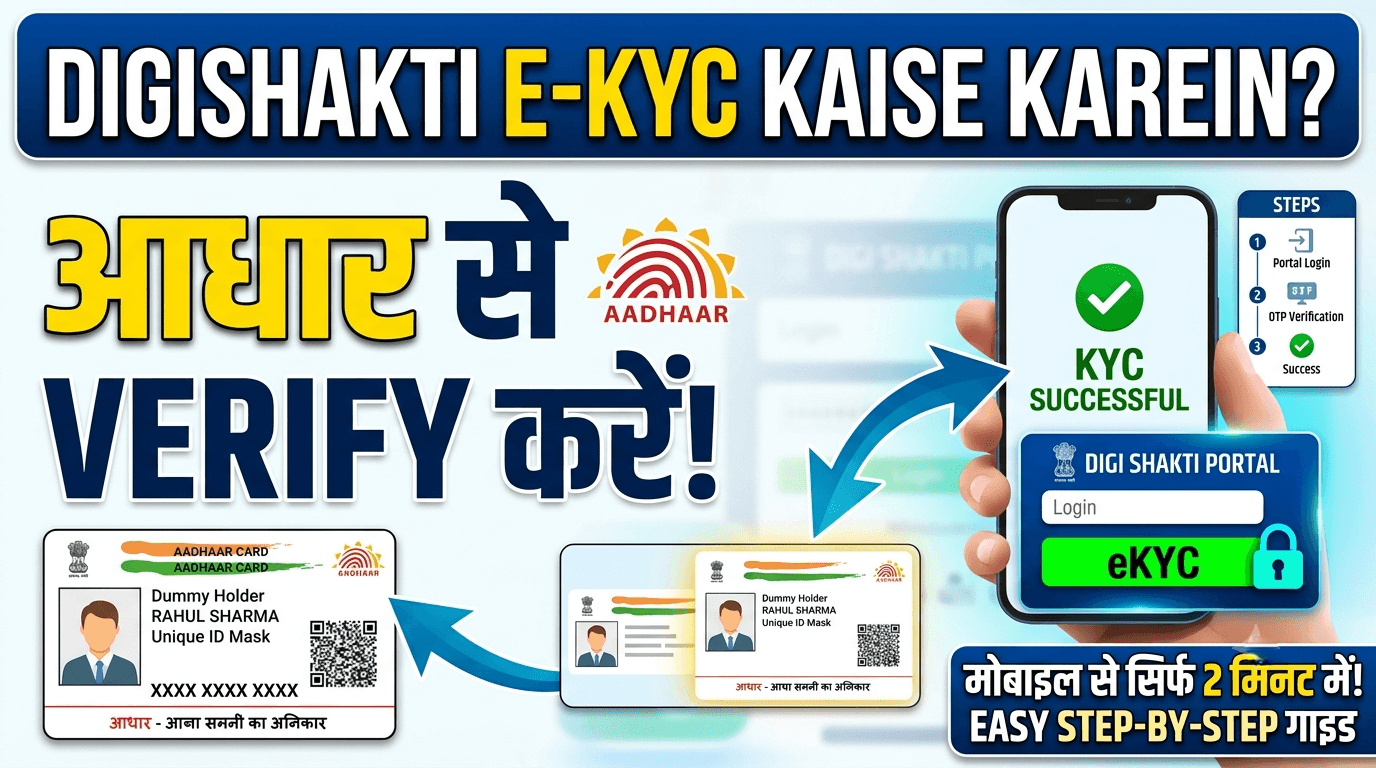
DigiShakti eKYC Kaise Karein – Aadhaar Se Verify Karein
Article Summary (3-Minute Read)
- Mandatory Requirement: eKYC is now mandatory — without it, you will not receive the free tablet or smartphone.
- Data Process: Your college uploads your data — you cannot register yourself on the portal manually.
- Simple Steps: Follow these 8 simple steps — visit digishakti.up.gov.in, sign up on the MeriPehchaan portal, and verify your Aadhaar with OTP.
- Verification Status: Ensure your status shows “Verified” — only then will your application move forward for device allocation.
- Support: Facing technical issues? Contact your College Nodal Officer — they are authorized to assist you with the process.
Important: Please ensure that your mobile number is linked to your Aadhaar card before starting the eKYC process to receive the OTP successfully.
DigiShakti Registration: Step-by-Step Process
What is DigiShakti Yojana?
The DigiShakti Yojana, officially known as the Swami Vivekanand Yuva Sashaktikaran Yojana, is a flagship initiative by the Uttar Pradesh government. Chief Minister Yogi Adityanath launched this scheme to bridge the digital divide among students across the state.
The primary goal is simple — provide free tablets and smartphones to students who cannot afford digital devices for their education. Whether you are pursuing graduation, post-graduation, medical studies, engineering, diploma, ITI, nursing, or skill development courses, this scheme is designed for you.
Why does this matter now?
The scheme has already benefited nearly 1 crore students across Uttar Pradesh. The government aims to reach over 68 lakh students in the current phase. However, there is a crucial update — eKYC (electronic Know Your Customer) verification has become mandatory for all students.
Without completing this Aadhaar-based verification on the official portal, you will not receive your device. No exceptions.
The good news? The process is straightforward. Your college uploads your data, and you simply need to verify your Aadhaar details online. This guide walks you through every single step, explains common problems, and gives you real solutions — all in simple Hinglish.
Key Highlights at a Glance
Swami Vivekanand Yuva Sashaktikaran Yojana (Mission DigiShakti)
| Scheme Name | Swami Vivekanand Yuva Sashaktikaran Yojana |
|---|---|
| Launched By | UP Govt, CM Yogi Adityanath |
| State | Uttar Pradesh |
| Benefit | Free Tablet OR Smartphone |
| Official Portal | digishakti.up.gov.in |
| Target Beneficiaries | UG, PG, Technical, Diploma, Medical, Nursing, ITI |
| Income Limit | Less than ₹2 Lakh/year |
| Age Limit | 18-35 years |
| Beneficiaries | Nearly 1 Crore students |
| eKYC Status | MANDATORY for distribution |
Who Can Apply? Complete Eligibility Guide

Before starting the eKYC process, check whether you qualify for this scheme. Many students waste time on eKYC only to discover they are not eligible.
✅ Eligible Candidates
- Residents of Uttar Pradesh — You must be a permanent resident of Uttar Pradesh
- Enrolled in recognized courses — Graduation, Post-graduation, Diploma, Medical, Nursing, ITI, Polytechnic, B.Tech, M.Tech, or Skill Development programs
- Studying in recognized institutions — Government colleges, private colleges, or universities with UP Higher Education Department recognition
- Annual family income below ₹2 Lakh — Income certificate required
- Age between 18-35 years
- No pending backlogs — Must have passed all previous exams
- First-time beneficiary — Each student can receive only one device under this scheme
❌ Who is NOT Eligible
Many competitors skip this section, but it is equally important to know:
- Students who are not residents of Uttar Pradesh
- Students whose family income exceeds ₹2 Lakh per year
- Students with pending backlogs or failed subjects
- Students who have already received a device under this scheme
- Students whose college has not uploaded their data on the DigiShakti portal
- Students under 18 years or above 35 years of age
Which Colleges and Universities Are Included?
The scheme covers educational institutions across all 75 districts of Uttar Pradesh. Here are examples from major districts:
Major Educational Institutions by District
| District | Major Institutions |
|---|---|
| Lucknow | Lucknow University, Integral University, BBD University, Ram Manohar Lohia Law University |
| Varanasi | Banaras Hindu University (BHU), Sampurnanand Sanskrit University, Mahatma Gandhi Kashi Vidyapith |
| Prayagraj | Allahabad University, Nehru-Gram Bharati University |
| Gorakhpur | Gorakhpur University, Madan Mohan Malaviya University |
| Kanpur | CSJM University (Kanpur University), HBTI, PPN College |
| Agra | Dr. B.R. Ambedkar University, Dayalbagh Educational Institute |
If your institution is recognized by the UP government and your college is uploading student data on the portal, you are included. The simplest way to confirm is to ask your college administration directly.
Documents Required for eKYC
Keep these documents ready before starting the eKYC process. Missing any document will delay your verification.
1. Aadhaar Card (Most Important)
Your Aadhaar details — name, date of birth, and gender — must exactly match the records your college has uploaded. If there is any mismatch, your eKYC will show a “Failed” status. Double-check your Aadhaar details on the UIDAI website before starting.
2. Enrollment Number
This is the single most common question students ask — “Enrollment number kahan se milega?” The answer is simple: your college administration has it. It is the same number you received during admission. If you cannot find it, visit your college office and ask for it.
3. College ID Card
Your identity proof for verification. Keep it handy.
4. Active Mobile Number
This mobile number must be linked to your Aadhaar card. You will receive OTP on this number for verification. If your number has changed, update your Aadhaar first.
5. Valid Email ID
OTP and communication will also be sent to your email. Check your inbox and spam folder regularly.
Step-by-Step eKYC Process on DigiShakti Portal
This is the most critical section. Follow each step carefully. The process has been verified from the official user manual (Annexure-1) of the DigiShakti portal.
Step 1: Visit the Official Portal
Open your browser and go to digishakti.up.gov.in. This is the only official website. Do not use any other website claiming to offer DigiShakti services.
Step 2: Access eKYC Section
On the homepage, you will see a button labeled “e-KYC through MeriPehchaan Portal.” Click on it. This will take you to the student search page.
Step 3: Enter Your Details
Fill in the following fields carefully:
- Select your University/Board from the dropdown
- Select your College/Institute Name
- Enter your Enrollment Number
- Type the Captcha Code
Click on the “Search” button.
Step 4: Check Your Current Status
Your student details will appear on the screen. Look at the status:
- If it shows “Pending” — you need to complete eKYC
- If it shows “Data is pending for Department Lock” — wait for verification
- If it shows “Verified” — you are already done
If the status is “Pending,” click on the “Verify through the Login Using e-Pramaan MeriPehchaan” button.
Step 5: Redirect to MeriPehchaan Portal
You will be redirected to the MeriPehchaan portal. This is the UP government’s official Aadhaar verification platform.
- If you are a new user, click on “New user? Signup for MeriPehchaan”
- If you already have an account, sign in directly
Step 6: Sign Up on MeriPehchaan
For new users:
- Enter your mobile number
- Click “Generate OTP”
- Enter the OTP received on your mobile
- Accept the terms and conditions
- Click “Sign-Up”
Some students face OTP issues here. If OTP does not arrive, try switching your mobile browser to “Desktop Mode.” Also ensure your mobile number is active and linked to Aadhaar.
Step 7: Aadhaar eKYC Verification
After successful sign-up, you will see the Aadhaar eKYC page:
- Enter your Aadhaar number
- Choose OTP delivery method (mobile or email)
- Click “Verify through e-KYC”
Step 8: Enter OTP and Complete Verification
You will receive an OTP on your Aadhaar-linked mobile number or email. Enter the OTP and submit.
Step 9: Return to DigiShakti Portal
Go back to the DigiShakti portal (digishakti.up.gov.in) and search for your details again using your enrollment number.
If everything is correct, your status will now show “Verified.” Congratulations — your eKYC is complete!
How to Check Your Beneficiary Status
After completing eKYC, students often ask — “Is my name in the beneficiary list?” Here is how to check:
- Visit digishakti.up.gov.in
- Click on “Meri Pehchaan Portal ke madhyam se e-KYC”
- Enter your University, College, and Enrollment Number
- Click “Search”
Understanding Your Status
Understanding Your DigiShakti Status
| Status Displayed | What It Means | What You Should Do |
|---|---|---|
| Verified | Your eKYC is complete. Data forwarded for device allocation. | Wait for SMS or college notice about distribution. |
| Pending | eKYC verification is incomplete. | Follow the 9-step process above. |
| Data pending for Department Lock | Government verification is in progress. | Wait for 2-3 days and check again. |
| Failed | Data mismatch with Aadhaar. | Contact your College Nodal Officer immediately. |
How Will You Receive Your Device?
Once your eKYC status shows “Verified,” the process continues automatically:
Step 1: Data Transfer
Your verified data becomes visible to your college. The college forwards it to the university for approval.
Step 2: Department Lock
The education department locks the data after final verification. This is why some students see “Department Lock” status briefly.
Step 3: District Nodal Officer
The District Nodal Officer receives the verified list and allocates devices based on availability.
Step 4: College Distribution
Your college organizes a distribution event. Students receive SMS or college notices informing them about the date and time.
Real Examples from Recent Distributions
- Lucknow University distributed 2,100 tablets to PG students on October 14, 2025
- Lucknow University held another distribution for M.P.Ed students on March 24, 2025
- Rama University, Kanpur distributed 2,500+ tablets to eligible students
- Metro College of Health Sciences and Research held distribution on November 29, 2024, with MLA Tejpal Singh Nagar as Chief Guest
What to Carry on Distribution Day
- Original Aadhaar Card
- Original College ID
- Enrollment Proof (printout or digital)
Timeline:
Some students receive devices within 2-3 weeks of eKYC, while others may wait longer depending on batch phases. Stay in touch with your college administration.
Device Specifications and Models
Different batches have received different device models. Here is a quick comparison:
DigiShakti Batch Comparison
| Feature | Batch 1 (22-23) | Batch 2 (23-24) | Batch 3 (24-25) | Batch 4 (25-26) |
|---|---|---|---|---|
| RAM | 2GB | 3GB | 4GB | Upcoming |
| Storage | 32GB | 32GB | 64GB | Upcoming |
| Brand | Various | Samsung, Acer, Lava | Samsung, Acer, Lava | Upcoming |
| Android | 11 | 12 | 13/14 | Upcoming |
| Status | Distributed | Distributed | Distributing | Active |
What to Expect
- Tablets are educational-purpose devices optimized for learning
- Smartphone option available for some students
- Devices come with pre-loaded educational content
- Service centers available for repairs
Common Problems and Solutions
Based on real student experiences from forums, YouTube comments, and grievance records, here are the top issues and their solutions.
Problem 1: “Failed” Status — Data Mismatch
Situation: You search for your details and the status shows “Failed.”
Why this happens:
Your Aadhaar details (name, date of birth, or gender) do not match the records your college uploaded on the portal.
Solution:
- Check your Aadhaar details on the UIDAI website (myaadhaar.uidai.gov.in)
- Go to your college administration and meet the DigiShakti Nodal Officer
- Show them your Aadhaar and request correction on the portal
- Alternatively, update your Aadhaar at the nearest Aadhaar center
Real Student Experience: “Mera eKYC ‘Failed’ dikha raha tha. Pata chala ki college ne mera DOB galat daal diya tha. Nodal Officer ne 2 din mein correct kar diya, phir verification ho gayi.”
Problem 2: “No Data Found” — Your Name Not in the List
Situation: You search but the portal says “No Data Found” or “Student not found.”
Why this happens:
Your college has not uploaded your data on the DigiShakti portal yet.
Solution:
- Visit your college administration office immediately
- Ask for the DigiShakti Nodal Officer
- Request them to upload your data on the portal
- Wait 24-48 hours after upload, then search again
Problem 3: OTP Not Arriving on MeriPehchaan Portal
Situation: You try to sign up or verify on MeriPehchaan but OTP never arrives.
Possible Causes:
- Your mobile number is not linked to Aadhaar
- Your mobile network is weak
- Browser compatibility issues
- Multiple OTP requests in quick succession
Solutions:
- Verify that your Aadhaar-linked mobile number is active
- Switch your mobile browser to “Desktop Mode”
- Wait at least 2-3 minutes between OTP requests
- Try using a different browser (Chrome, Firefox)
- If still not working, try from a laptop/desktop computer
Problem 4: “Data is pending for Department Lock”
Situation: Your search shows this status and you cannot proceed.
Why this happens:
This is a normal part of the verification process. The education department is reviewing and locking the data.
Solution:
- Do not panic — this is not an error
- Wait for 2-3 days
- Check again after 48 hours
- If it remains the same for over a week, contact your college Nodal Officer
Problem 5: Device Distribution Delay After eKYC
Situation: Your eKYC shows “Verified” but weeks pass without device delivery.
Why this happens:
Devices are distributed in phases. Your batch may not have been scheduled yet.
Solution:
- Stay in touch with your college administration
- Check if other students from your college have received devices
- Verify that your status still shows “Verified”
- If multiple months pass, escalate to District Nodal Officer
Problem 6: Enrollment Number Not Available
Situation: You do not know your enrollment number and cannot start the process.
Solution:
- Check your admission documents — the enrollment number is usually mentioned
- Ask your classmates — they might have the same format
- Visit the college administration office and request your enrollment number
- Check your college’s student portal if available
Real Student Stories
Story 1: Priya from BHU, Varanasi
College: Banaras Hindu University (BHU)
Course: MA Political Science
Priya logged onto digishakti.up.gov.in and found her status as “Pending.” She followed the complete eKYC process, signed up on MeriPehchaan, verified her Aadhaar with OTP, and within 3 days her status changed to “Verified.” Exactly 15 days later, BHU organized a distribution event where Priya received her free tablet.
“I watched a YouTube video and followed each step carefully. The portal instructions were clear, and I faced no major issues. The tablet has helped me attend online classes without borrowing my brother’s phone.”
Story 2: Amit from Private College, Gorakhpur
College: G.N.D. College, Gorakhpur
Course: B.Com Final Year
When Amit searched on the portal, it showed “No Data Found.” He panicked initially but then visited his college office. The administration informed him that data upload had not happened yet. They asked him to come back after one week. Amit waited, and when the college uploaded the data, he immediately completed his eKYC. Ten days later, he received an SMS from the college — “Please collect your DigiShakti tablet.”
“The key lesson is to stay in touch with your college. They are the ones who make the process happen. Don’t just wait and wonder — go ask them directly.”
Story 3: Rohit from Lucknow University
College: Lucknow University
Course: B.Sc
Rohit completed his eKYC quickly and his status showed “Verified.” However, his friend who completed eKYC on the same day received a tablet within two weeks, but Rohit did not. He contacted the college office and discovered that his specific course batch was scheduled for a later distribution phase. One week later, Rohit received his tablet too.
“Distribution happens in phases. Some students get it early, some later. Be patient and keep checking with your college.”
Device Repair and Replacement Process
What to Do If Your Device Develops Issues
- First Step: Contact your college administration — they will provide service center details
- Service Center: Check the “Service Center” section on the official DigiShakti portal for authorized centers in your district
- Documents Required: Carry the device, Aadhaar copy, college ID, and distribution slip
- Warranty Coverage: Typically 1-year hardware warranty
- Free Repair: Warranty covers manufacturing defects
- Charges Apply: Physical damage (drop, water, etc.) may incur repair costs
Pro Tip: Call the service center before visiting to confirm they handle DigiShakti device repairs.
Fraud Warning — Fake Sites and Middlemen
⚠️ IMPORTANT: The DigiShakti scheme has NO registration fee.
Criminals are creating fake websites and apps to trick students. Some common scams:
- Fake Websites: Sites that look like digishakti.up.gov.in but collect your Aadhaar details
- Middlemen: People who promise “device dilwa dunga” for money
- Fake Apps: Apps claiming to be “DigiShakti” that steal your data
- Paid Registration: Anyone asking for money to register you
How to Stay Safe
- ✅ Use ONLY the official portal: digishakti.up.gov.in
- ✅ Never pay anyone for DigiShakti registration
- ✅ Never share your Aadhaar OTP with anyone
- ✅ Do not download any “DigiShakti” app from outside Play Store
- ✅ Report suspicious calls or messages to college authorities
Helpline and Grievance Contact
DigiShakti Support & Contact Details
| Resource | Details / Link |
|---|---|
| Official Portal | digishakti.up.gov.in |
| College Nodal Officer | First contact for all issues |
| District Nodal Officer | For device distribution queries |
| UP Govt Scheme Portal | yuvasathi.in |
| Aadhaar Update | myaadhaar.uidai.gov.in |
Where to Complain
Whom to Contact for Support
| Issue Type | Whom to Contact |
|---|---|
| Data mismatch / Failed status | College Nodal Officer |
| Name not in list | College Administration |
| Device not received | College → District Nodal Officer |
| Device repair | Authorized Service Center |
| Grievance escalation | Official portal Helpdesk |
Frequently Asked Questions
1. What is DigiShakti eKYC?
DigiShakti eKYC is an Aadhaar-based verification process required for UP government’s free tablet/smartphone scheme. Students verify their identity on the digishakti.up.gov.in portal through the MeriPehchaan platform.
2. Is DigiShakti eKYC mandatory?
Yes, eKYC is now compulsory. If you do not complete this verification, you will not receive the free tablet or smartphone under this scheme.
3. Where do I get my enrollment number?
Your enrollment number is available from your college administration office. It is the same number you received during admission. Visit your college office and request it.
4. Can I register directly on the DigiShakti portal?
No. Your college uploads your data on the portal. You cannot register yourself. Your role is only to complete the eKYC verification.
5. What is the MeriPehchaan portal?
MeriPehchaan is the UP government’s official platform for Aadhaar-based eKYC verification. It is the system used to verify students’ identities for the DigiShakti scheme.
6. What is the income limit for this scheme?
Your annual family income must be less than ₹2 Lakh. Income certificate verification is required.
7. Are private college students eligible?
Yes, students from recognized private colleges are eligible, provided their institution has UP government recognition and is uploading data on the portal.
8. My eKYC shows “Failed” — what should I do?
Contact your College Nodal Officer immediately. This happens due to data mismatch between your Aadhaar details and college records. They can correct the data on the portal.
9. How do I check my name in the beneficiary list?
Visit digishakti.up.gov.in, click on “e-KYC through MeriPehchaan,” enter your University, College, and Enrollment Number, then search.
10. When will I receive the device after eKYC?
The college organizes distribution events. You will receive SMS or college notice. Some students get devices within 2-3 weeks, while others may wait longer depending on batch phases.
11. Is the DigiShakti scheme active in 2026?
Yes, the scheme is active for the 2025-26 fiscal year. Distribution drives continue across Uttar Pradesh.
12. I completed eKYC but my college hasn’t given the tablet — what should I do?
First, visit your college office and meet the DigiShakti Nodal Officer. Show them your verified status on the portal. If they cannot help, escalate to the District Nodal Officer or use the official portal’s grievance section.
13. Can I get both a tablet and a smartphone?
No, this is a one-time benefit. Each eligible student receives only one device.
14. I have a backlog — am I eligible?
No. Students with pending backlogs are not eligible. You must have cleared all previous exams.
15. What documents are required for eKYC?
You need: Aadhaar Card, Enrollment Number, College ID Card, Active Mobile Number (Aadhaar-linked), and Valid Email ID.
16. Can I complete eKYC from my mobile phone?
Yes, the process works on mobile browsers. If you face OTP issues, try switching to “Desktop Mode” in your browser settings.
17. Which tablets are given under this scheme?
Different batches receive different models. Recent batches include Samsung, Acer, and Lava tablets with 4GB RAM and 64GB storage. Specifications may vary.
18. What if my name is not in the college list?
Contact your college administration immediately. They may not have uploaded your data yet. Once they upload, you will appear in the list.
19. How many students have benefited so far?
Nearly 1 crore students have received devices under this scheme. The government aims to reach over 68 lakh more students.
20. Who is NOT eligible for this scheme?
Students outside UP, those with income over ₹2 Lakh, those with backlogs, students already benefited from this scheme, students under 18 or over 35, and students whose colleges haven’t uploaded their data.
Conclusion
Completing your DigiShakti eKYC is a straightforward process if you follow the steps carefully. The official portal — digishakti.up.gov.in — is your only trusted source for verification.
Key Takeaways:
- ✅ eKYC is mandatory — do it now, don’t delay
- ✅ Your college uploads data — stay in touch with them
- ✅ Use only the official portal — avoid fake websites
- ✅ Keep all documents ready before starting
- ✅ If stuck, contact your College Nodal Officer
Trust Signals
Official Government Notification
UP Higher Education Department’s official statement: “Under Swami Vivekanand Yuva Sashaktikaran Yojana, nearly 1 crore (approximately 10 million) students have already availed the benefit of free tablets and smartphones. The scheme aims to provide free tablets and smartphones to over 68 lakh students in the state.”
Verification Note
digiyojana.com team has verified all information in June 2026 from:
- Official portal: digishakti.up.gov.in
- UP Higher Education Department documents
- University of Lucknow official notices
- ABP Live, Jagran news reports
References
- Official Portal: https://digishakti.up.gov.in
- UP Government Scheme Portal: yuvasathi.in/schemes-detail/up-free-tablet-smartphone-yojana
- University of Lucknow Notices: https://www.lkouniv.ac.in
- Aadhaar Update: https://myaadhaar.uidai.gov.in
Related Articles
- UP Free Laptop Yojana — Another UP government scheme for students
- UP Scholarship Portal Guide — Complete guide for scholarship applications
- UP Berojgari Bhatta — Unemployment allowance for UP youth
Disclaimer: This information is verified from official government sources as of June 2026. Scheme rules may change. Always check the official portal (digishakti.up.gov.in) for the latest updates.